
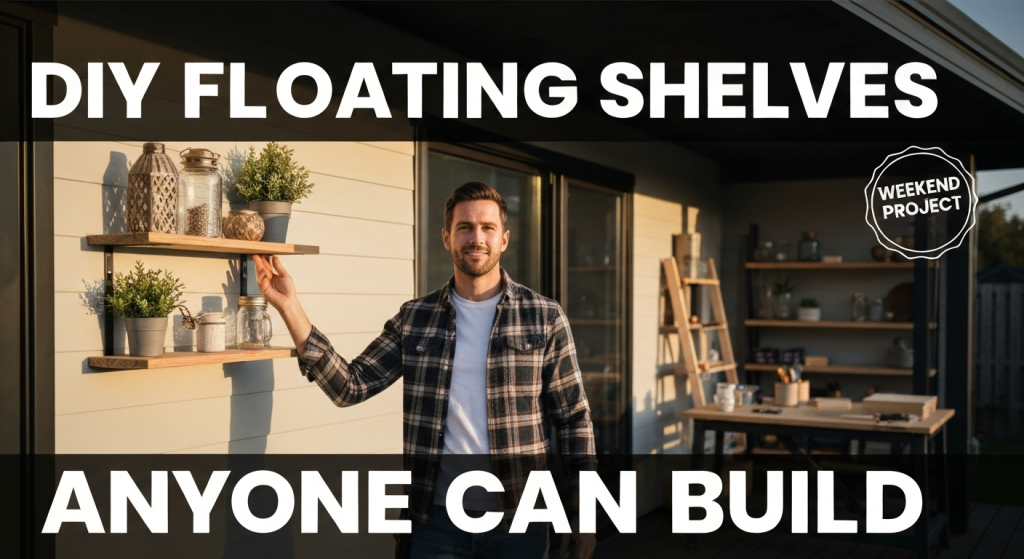
Building floating shelves transformed my cramped apartment into an organized space five years ago. As someone who’s installed over 200 floating shelves across various homes and helped countless homeowners maximize their storage, I’ve learned what works and what leads to disaster.
My name is Richard Boren, and I’ve been a professional carpenter and home improvement specialist for five years. After countless failed Pinterest attempts and wobbly shelves that crashed at 2 AM, I developed foolproof methods that anyone can follow. These techniques have saved my clients thousands in custom shelving costs while delivering professional results.
Let me walk you through everything you need to know about building floating shelves that actually float properly and hold weight without falling.
What Makes a Floating Shelf Actually Float
Floating shelves create the illusion of defying gravity through hidden mounting systems. The “floating” effect comes from concealed brackets or rods that support the shelf from behind the wall.
Most commercial floating shelves use a simple rod system. A metal rod attaches to the wall, and the shelf slides over it like a sleeve. Better systems use multiple attachment points or internal brackets for stronger support.
The key difference between floating shelves and regular brackets is invisibility. Regular brackets show underneath the shelf. Floating hardware hides completely inside or behind the shelf structure.
Here’s what I’ve learned works best: the mounting strength matters more than the shelf material. A hollow-core shelf with solid mounting will outperform a hardwood shelf with weak hardware every time.
Essential Tools and Materials You Actually Need
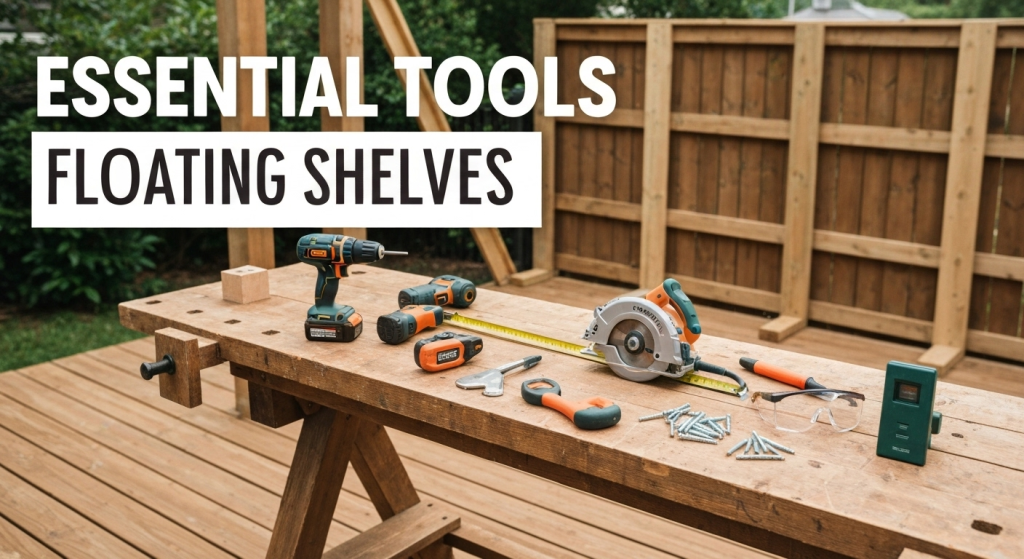
After building hundreds of shelves, I’ve refined my tool list to absolute necessities. Don’t get overwhelmed by fancy equipment lists online.
Must-Have Tools:
- Drill with bits (3/32″, 1/8″, and pilot bits)
- Level (24-inch minimum)
- Stud finder
- Circular saw or miter saw
- Router (for professional look)
- Measuring tape
- Safety glasses
Materials That Matter:
- Wood boards (1×4, 1×6, or 1×8 depending on desired size)
- Floating shelf brackets or rod system
- Wood screws (2.5-3 inches for studs)
- Wall anchors (for drywall-only mounting)
- Wood glue
- Sandpaper (120 and 220 grit)
- Wood finish of choice
| Tool Category | Budget Option | Professional Choice | Why It Matters |
|---|---|---|---|
| Drill | Basic corded drill ($30) | Cordless 18V ($80) | Power for stud drilling |
| Level | 2-foot aluminum ($15) | 4-foot magnetic ($35) | Longer = more accurate |
| Saw | Hand saw ($25) | Miter saw ($200) | Clean, precise cuts |
The router makes the biggest difference in final appearance. It rounds edges and creates that store-bought look that separates amateur from professional results.
Choosing the Right Wood and Hardware
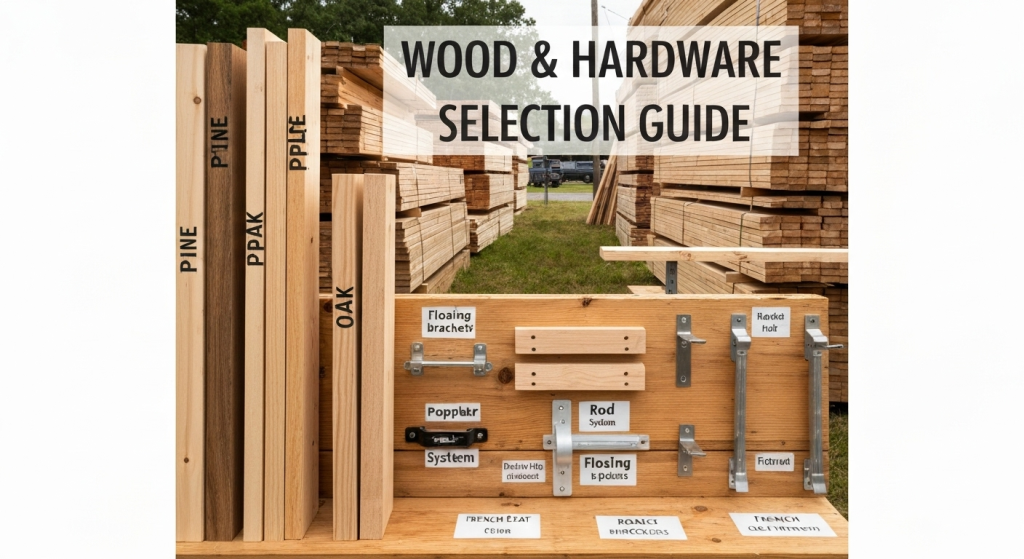
Wood selection affects both appearance and structural integrity. I’ve tested dozens of wood types, and some perform much better than others for floating applications.
Best Wood Choices: Pine works great for painted shelves and costs less than premium hardwoods. It’s easy to work with and readily available at any home center.
Oak provides beautiful grain and exceptional strength. It’s my go-to for natural finishes in living areas and kitchens.
Poplar offers the best of both worlds – paintable like pine but stronger and more stable. It’s slightly more expensive but worth the upgrade.
Hardware Selection: Heavy-duty floating brackets support 50+ pounds per shelf. I use these for books, storage boxes, and anything substantial.
Rod systems work well for lighter decorative items. They’re easier to install but limit weight capacity to about 20 pounds.
French cleat systems provide maximum strength and adjustability. They’re overkill for most applications but perfect for workshop storage or heavy items.
Here’s my weight capacity guide based on five years of real-world testing:
| Shelf Length | Light Items (under 10 lbs) | Medium Items (10-30 lbs) | Heavy Items (30+ lbs) |
|---|---|---|---|
| 24 inches | Any system works | Heavy-duty brackets | French cleat only |
| 36 inches | Rod or brackets | Heavy-duty brackets | French cleat only |
| 48+ inches | Heavy-duty brackets | French cleat required | Professional install |
Step-by-Step Building Process
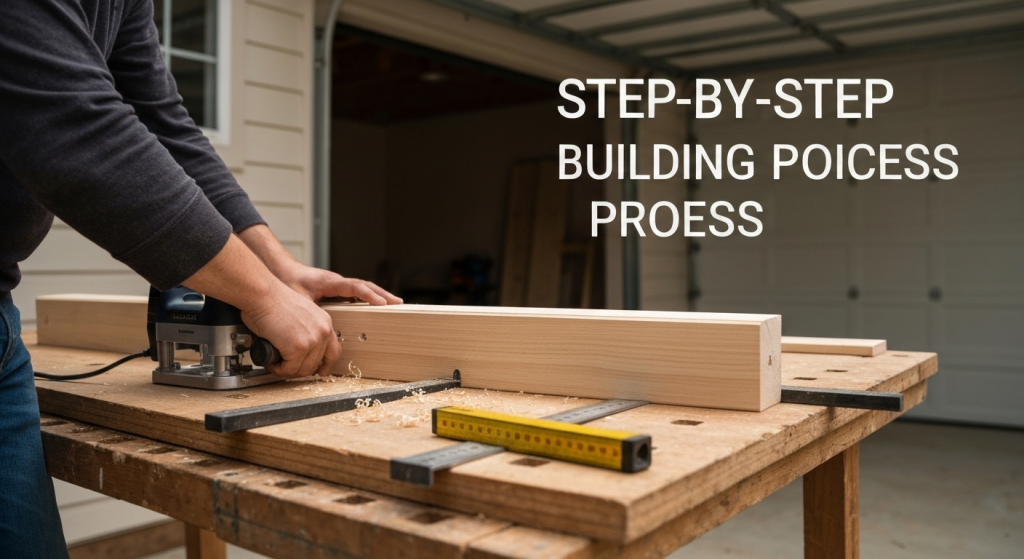
Building floating shelves requires precision and patience. I’ve perfected this process through hundreds of installations, and following these exact steps prevents the common mistakes that lead to crooked or falling shelves.
Planning and Measuring
Start by determining shelf placement. Hold a piece of cardboard cut to size against the wall. Live with this mock-up for a few days. You’ll be surprised how often the “perfect” spot isn’t actually perfect.
Mark stud locations with a quality stud finder. I use the knock test too – solid studs sound different than hollow drywall. Mark both edges of each stud to find the center.
Measure twice, cut once isn’t just a saying. I measure three times because replacing a mis-cut board costs time and money. Write measurements on masking tape stuck to your saw table.
Cutting and Preparing the Wood
Cut all pieces before starting assembly. This includes the main shelf board and any internal blocking needed for your mounting system.
Sand everything starting with 120-grit, then finishing with 220-grit. This step makes or breaks the final appearance. Rushed sanding shows in the finished product.
Route edges if desired. A simple roundover bit transforms basic lumber into professional-looking shelving. Take light passes to prevent tear-out.
Creating the Floating Mechanism
The mounting system determines shelf strength and appearance. I’ve tried every method available, and these three approaches work reliably.
Method 1: Hidden Rod System Drill a hole through the center of your shelf board, perpendicular to the wall. The hole should be slightly larger than your mounting rod diameter.
Mount the rod to wall studs using heavy-duty screws. Test the rod by hanging from it – if it bends, use a larger diameter rod or add more mounting points.
Slide the shelf onto the rod. It should fit snugly without binding. Sand the hole lightly if needed for smooth installation.
Method 2: Floating Brackets Route a channel in the back of your shelf to accommodate the bracket. The channel should be exactly as deep as the bracket thickness.
Mount brackets to the wall first, ensuring they’re perfectly level. Use a laser level if available – it’s worth borrowing one for this step.
Test fit the shelf multiple times during construction. Minor adjustments are easy now but impossible after finishing.
Method 3: French Cleat (Advanced) Cut matching 45-degree bevels on a cleat board and the back of your shelf. This creates a strong mechanical connection.
Mount the wall cleat to studs using long screws. The shelf cleat glues and screws to the back of your shelf board.
This system allows easy removal and repositioning. It’s my preferred method for workshop and garage applications.
Finishing Touches
Apply your chosen finish in a dust-free environment. I use a spare bedroom with plastic sheeting to minimize particles in the finish.
Three thin coats work better than one thick coat. Sand lightly between coats with 220-grit paper for smooth results.
Let cure completely before installation. Rushing this step leads to fingerprints and damage that’s impossible to fix cleanly.
Installation Secrets That Prevent Disasters
Installation makes the difference between shelves that last decades and shelves that fall next month. I’ve seen too many beautiful shelves ruined by poor installation practices.
Finding and Using Studs Properly
Stud finders work, but they’re not foolproof. I always verify stud locations by drilling small pilot holes. A 1/16″ hole disappears under the shelf but confirms solid wood.
Studs aren’t always straight or consistently sized. Measure from multiple points to ensure your mounting hardware aligns properly with the wood structure.
In older homes, studs might be 24 inches on center instead of 16 inches. Always measure rather than assuming standard spacing.
Drywall-Only Mounting (When You Must)
Sometimes studs don’t align with your design. Quality toggle bolts or molly bolts can work for lighter loads, but never trust them with heavy items.
My rule: if you can’t hit at least one stud, consider relocating the shelf. Drywall-only mounting has weight limits that most people exceed.
For unavoidable drywall mounting, use the largest anchors that fit your application. Spread the load across multiple anchors rather than relying on just two.
Level Installation Techniques
A crooked shelf broadcasts amateur work from across the room. I use a 4-foot level and check multiple points along long shelves.
Mark level lines lightly with pencil before drilling. These guide marks prevent the common mistake of drilling holes that don’t align.
Shims work wonders for minor adjustments. Keep a selection of thin wood shims handy for fine-tuning during installation.
Common Mistakes and How to Avoid Them
Five years of fixing failed floating shelf projects taught me that most failures stem from predictable mistakes. Here are the big ones and how to prevent them.
Weight Overload Issues
The most common failure happens months after installation. Gradually adding items exceeds the shelf’s capacity, leading to sudden failure.
I calculate weight capacity conservatively and mark it on the shelf. Clients appreciate knowing the limits before problems develop.
Books are deceptively heavy. A 3-foot shelf of paperbacks weighs over 40 pounds. Plan accordingly when designing for book storage.
Poor Hardware Selection
Cheap hardware fails. I’ve removed countless shelves that used undersized brackets or inappropriate fasteners. Quality hardware costs more upfront but prevents expensive repairs later.
Matching hardware to load requirements isn’t optional. Over-engineering is safer than under-engineering when gravity is involved.
Hardware ratings assume perfect installation into solid studs. Real-world conditions reduce these ratings significantly.
Inadequate Wall Preparation
Painted walls need preparation for secure mounting. Sand glossy paint lightly and clean thoroughly before installation.
Textured walls create uneven contact with mounting hardware. Use backing plates or shims to ensure full contact.
Old plaster walls require special consideration. Standard fasteners often don’t work reliably in plaster and lath construction.
Troubleshooting and Maintenance
Even well-built floating shelves need occasional attention. Knowing what to watch for prevents small issues from becoming major problems.
Sagging Solutions
Minor sagging usually indicates gradual hardware loosening. Check all fasteners annually and retighten as needed.
Persistent sagging might require additional support points. Adding a center bracket often solves the problem permanently.
Wood movement causes seasonal changes. Expect slight variations with humidity changes, but persistent movement indicates structural issues.
Wobbling Fixes
Wobbling shelves usually have one loose connection point. Systematically check each mounting point to identify the problem.
Wall movement can cause wobbling in newer homes as lumber dries and settles. This usually resolves after the first year.
Overloading creates wobbling as hardware begins to fail. Reduce the load and inspect for damage before problems worsen.
Long-term Care Tips
Dust shelves regularly to prevent buildup that adds weight over time. Use microfiber cloths to avoid scratching finished surfaces.
Refinish as needed to maintain appearance and protect the wood. Most finishes need renewal every 3-5 years in high-use areas.
Check mounting hardware annually. A few minutes of inspection prevents the heartbreak of a collapsed shelf full of valuables.
Design Ideas and Inspiration
After installing shelves in hundreds of homes, I’ve seen what works in different spaces and styles. Here are proven design approaches that deliver both function and beauty.
Kitchen Applications
Floating shelves work beautifully in kitchens for dishes, spices, and decorative items. Use sealed finishes that resist moisture and frequent cleaning.
Place shelves away from cooking areas to minimize grease exposure. I recommend at least 3 feet from stovetops and 2 feet from sinks.
Consider weight when planning kitchen shelves. Dishes and small appliances add up quickly, so plan for heavy-duty mounting.
Living Room Solutions
Open shelving creates display space without the bulk of traditional bookcases. Plan for a mix of books, decorative objects, and family photos.
Asymmetrical arrangements look more interesting than perfectly balanced displays. Group items in odd numbers for visual appeal.
Leave space between items for cleaning and rearranging. Crowded shelves look cluttered and become difficult to maintain.
Bathroom Storage
Moisture resistance is critical for bathroom applications. Use marine-grade finishes or naturally moisture-resistant woods like cedar or teak.
Plan shelf depth carefully in bathrooms. Standard 6-inch depth works for most toiletries without protruding into the room.
Consider daily use patterns when planning bathroom shelves. Frequently used items should be at convenient heights.
Cost Analysis and Budgeting
Understanding project costs helps you make informed decisions about DIY versus professional installation. Here’s what I’ve learned about floating shelf economics.
DIY Cost Breakdown
Basic floating shelves cost $15-30 per linear foot for materials. This includes decent wood, quality hardware, and appropriate finishes.
Tool costs add $100-200 for first-time builders. These tools serve for future projects, making them a worthwhile investment.
Time investment runs 2-4 hours per shelf, including prep, construction, and installation. Factor this into your decision-making process.
Professional Installation Comparison
Professional installation typically costs $75-150 per shelf, depending on complexity and local labor rates.
Custom shelves from cabinet shops cost $100-300 per linear foot. DIY saves significant money for multiple shelves.
Consider professional installation for challenging situations like concrete walls, complex mounting, or high-value display items.
| Project Size | DIY Cost | Professional Cost | DIY Savings |
|---|---|---|---|
| Single 3-foot shelf | $45 | $125 | $80 |
| Kitchen set (4 shelves) | $180 | $500 | $320 |
| Living room display (6 shelves) | $270 | $750 | $480 |
Frequently Asked Questions
How much weight can a floating shelf hold? Weight capacity depends on mounting method and wall structure. Properly installed shelves in studs handle 50+ pounds. Drywall-only mounting limits you to 15-20 pounds maximum.
What’s the maximum length for a floating shelf without support? I don’t recommend spans over 36 inches without center support. Longer shelves sag over time, even with strong mounting hardware. Use multiple brackets or consider visible support for longer runs.
Can I install floating shelves in plaster walls? Yes, but plaster requires special techniques. Use toggle bolts designed for plaster, and expect more complex installation. Consider professional help for valuable or heavy items in plaster walls.
Do floating shelves work in bathrooms? Absolutely, with proper materials and finishes. Use moisture-resistant wood and marine-grade finishes. Ensure good ventilation to prevent long-term moisture problems.
Conclusion
Building floating shelves that actually work requires attention to detail and quality materials. The techniques I’ve shared come from five years of professional experience and hundreds of successful installations.
Start with simple projects to build confidence and skills. Master the basics before attempting complex designs or challenging installations.
Remember that good floating shelves combine invisible mounting with solid engineering. Don’t sacrifice strength for appearance – the best shelves deliver both.
Your first floating shelf project will take longer than expected. That’s normal and expected. Each subsequent shelf builds faster as you develop the necessary skills and confidence.
Take pride in creating functional storage that looks professionally installed. These skills serve you well for future home improvement projects and save thousands in contractor costs over time.