
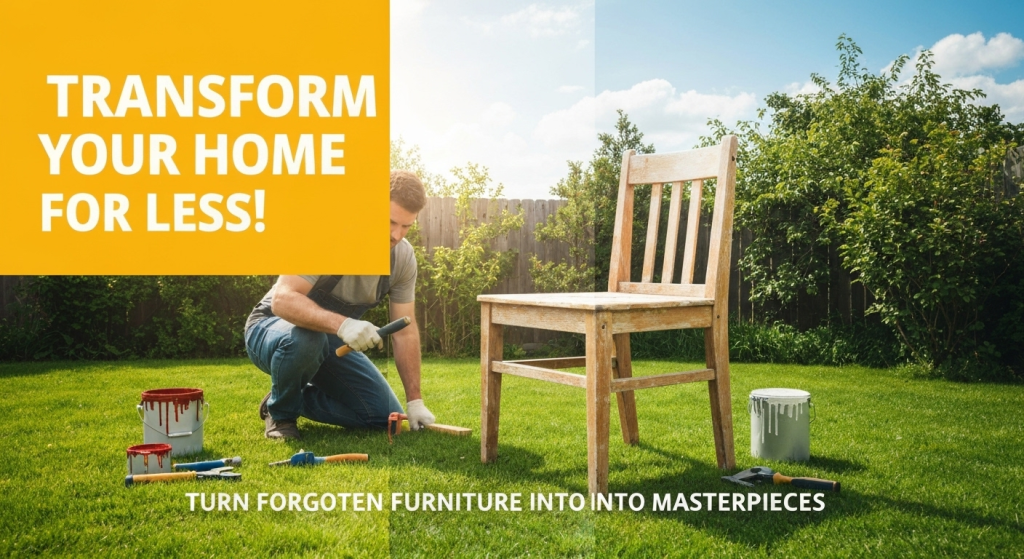
Old furniture doesn’t have to end up in landfills or garage sales. With the right techniques and creative vision, those worn-out pieces gathering dust can become the centerpiece of your home décor. I’m Richard Boren, and over my five years as a furniture restoration specialist, I’ve transformed hundreds of forgotten pieces into stunning statement furniture that rivals expensive designer items.
My journey into furniture repurposing started when I couldn’t afford new furniture for my first apartment. That old dining table my grandmother left me seemed hopeless until I discovered the magic of restoration. Today, I run a successful furniture transformation business, helping homeowners save money while creating unique pieces that tell their story.
The furniture repurposing industry has exploded in recent years. According to the EPA, Americans throw away over 12 million tons of furniture annually. Yet 80% of discarded furniture could be restored or repurposed with basic skills and creativity. This guide will show you exactly how to join this sustainable movement while creating beautiful, functional pieces for your home.
What Makes Furniture Worth Repurposing

Not every old piece deserves your time and effort. Learning to spot good candidates saves you frustration and money. The key lies in understanding bone structure versus surface damage.
Solid Wood Construction Real wood furniture offers the best foundation for transformation. Look for pieces made from oak, maple, cherry, or pine. These materials accept stains, paints, and finishes beautifully. Press your fingernail into an inconspicuous area. If it dents easily, you likely have softwood that’s still workable. If it resists, you’ve found hardwood gold.
Particle board and MDF have limitations but aren’t automatically deal-breakers. These materials work well for painted finishes but won’t accept stains effectively. I once transformed a particle board bookshelf into a stunning kitchen island using chalk paint and decorative molding.
Structural Integrity Check Shake the piece gently. Solid furniture should feel stable without excessive wobbling. Check joints where different pieces meet. Loose joints can be fixed with wood glue and clamps. However, completely separated joints or cracked main supports might require professional help.
Look for water damage, especially on the bottom and back panels. Dark stains, soft spots, or musty odors indicate serious moisture problems. These issues often cost more to fix than buying replacement furniture.
Hardware Assessment Original hardware adds character and value. Brass, copper, and wrought iron pieces from older furniture often surpass modern alternatives in quality. Even rusty hardware can be restored with naval jelly or electrolysis. However, missing hardware isn’t a problem since replacement options abound at thrift stores and online retailers.
| Good Candidates | Problem Signs | Still Workable |
|---|---|---|
| Solid wood construction | Extensive water damage | Surface scratches |
| Minor joint looseness | Broken main supports | Missing hardware |
| Quality hardware | Particle board delamination | Outdated style |
| Good proportions | Pest damage | Worn finish |
Essential Tools and Materials for Furniture Transformation
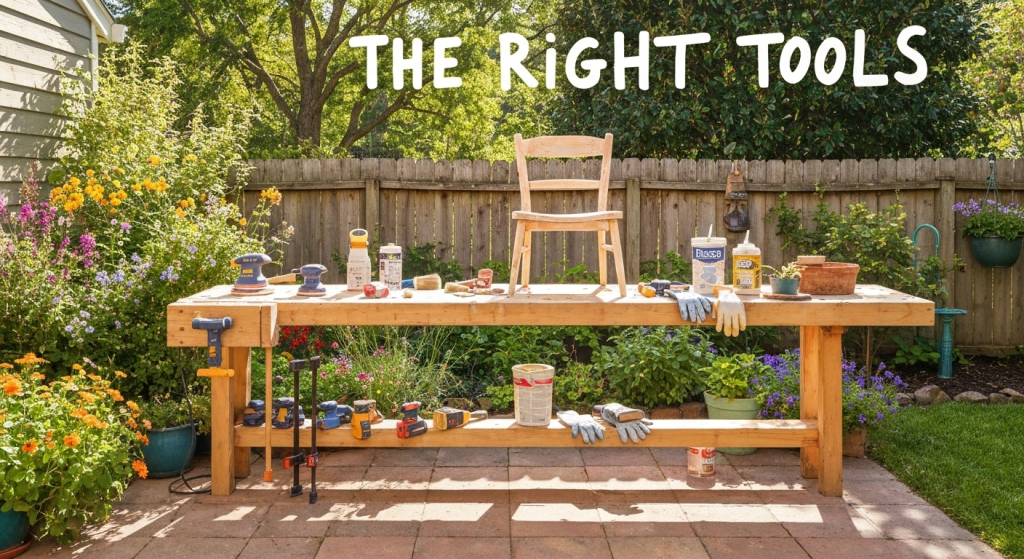
Success in furniture repurposing depends heavily on having the right tools. You don’t need a full workshop immediately, but certain items make the difference between professional-looking results and amateur attempts.
Basic Tool Kit Start with a quality palm sander. This tool removes old finishes efficiently without the arm fatigue of hand sanding. I recommend 120-grit sandpaper for initial stripping and 220-grit for final smoothing. A detail sander helps with corners and curved areas that palm sanders can’t reach.
Invest in good brushes. Natural bristle brushes work best with oil-based products, while synthetic brushes handle water-based materials. A 2-inch angled brush covers most furniture painting needs. Keep a smaller artist’s brush for detail work.
Safety equipment isn’t optional. Dust masks prevent inhaling particles, while safety glasses protect your eyes from flying debris. Rubber gloves keep chemicals off your skin, and a first aid kit handles minor cuts and scrapes.
Specialty Items Wood filler repairs dents, holes, and imperfections. Choose between water-based fillers for painted finishes or stainable versions for natural wood looks. A putty knife spreads filler smoothly and removes excess material.
Chemical strippers work faster than sanding on intricate details. Gel strippers cling to vertical surfaces better than liquid versions. Always use strippers in well-ventilated areas and follow manufacturer instructions exactly.
Clamps hold repairs while glue dries. Bar clamps work well for large panels, while C-clamps handle smaller areas. Quick-grip clamps offer convenience for temporary holding.
Finishing Supplies The finish makes or breaks your project. Polyurethane provides durable protection for high-use pieces like tables and chairs. Paste wax offers a traditional look with moderate protection. Tung oil penetrates wood deeply while maintaining a natural appearance.
Primer ensures paint adhesion, especially over glossy surfaces or different materials. Use bonding primer for laminate or metal components. Regular wall primer works fine over previously painted wood.
Budget-Friendly Alternatives New tools cost money, but alternatives exist. Harbor freight tools work well for occasional use. Garage sales and estate sales often include tool collections at fraction of retail prices. Some home improvement stores rent sanders and other power tools.
Make your own wood conditioner by thinning your stain 50% with mineral spirits. This technique prevents blotchy staining on softwoods like pine. Old t-shirts work better than paper towels for applying stains and wipes.
Step-by-Step Furniture Preparation Process
Proper preparation determines your project’s final quality. Rushing this stage guarantees disappointing results, while thorough prep work creates a foundation for professional-looking finishes.
Initial Assessment and Planning Document your piece with photographs from multiple angles. These images help you remember original configurations during reassembly. Measure dimensions and note any missing parts or hardware.
Remove all hardware using appropriate screwdrivers. Place screws and small parts in labeled containers. I use egg cartons for organization, with each compartment holding parts from specific areas.
Test inconspicuous areas to understand your piece’s construction and finish. A small amount of denatured alcohol reveals shellac finishes. Lacquer thinner dissolves lacquer. Knowing your existing finish helps choose appropriate stripping methods.
Deep Cleaning Start with simple soap and water to remove surface dirt and grime. Murphy’s Oil Soap works well on wood without causing damage. Avoid harsh chemicals that might penetrate wood pores and interfere with new finishes.
For stubborn residue, try denatured alcohol on a cloth. This solvent removes many adhesives, stickers, and light stains without raising wood grain. White vinegar mixed with equal parts water tackles mineral deposits and water spots.
Pay special attention to joints and crevices where dirt accumulates. An old toothbrush reaches tight spaces effectively. Cotton swabs dipped in cleaning solution clean detailed carved areas.
Surface Stripping Choose your stripping method based on the existing finish and project timeline. Sanding works well for single finish layers but creates dust. Chemical strippers handle multiple layers efficiently but require proper ventilation and disposal.
When sanding, start with coarser grits and progress to finer ones. Skip grit numbers create scratches that show through new finishes. Sand with the wood grain, never against it. Clean dust between grits using tack cloth or microfiber rags.
Chemical strippers need time to work properly. Apply generous coats and cover with plastic wrap to prevent evaporation. Most strippers work in 15-30 minutes. Scrape softened finish with plastic scrapers to avoid gouging wood.
Repair Work Address structural issues before cosmetic ones. Tighten loose joints by removing old glue residue and applying fresh wood glue. Clamp joints firmly and allow 24 hours drying time. Don’t rush this step since weak joints will fail again under use.
Fill holes, dents, and scratches with appropriate wood filler. Overfill slightly since most fillers shrink when drying. Sand filled areas smooth after curing, blending edges with surrounding wood.
Replace missing molding or trim pieces. Architectural salvage yards offer period-appropriate options. Home improvement stores stock standard profiles that work for most projects. Miter joints carefully for professional appearance.
Creative Repurposing Ideas That Actually Work

The most successful furniture transformations solve real problems while creating beautiful pieces. These proven ideas come from my experience helping homeowners maximize their space and style.
Storage Solutions Old dressers make excellent bathroom vanities with proper modifications. Remove the top drawers and cut openings for plumbing. The remaining drawers provide valuable storage in small bathrooms. Add a vessel sink and stone countertop for a custom look that costs fraction of store-bought vanities.
Transform tall bookcases into kitchen pantries by adding adjustable shelves and door-mounted racks. Paint the interior with chalkboard paint to create shopping lists and meal planning space. This conversion works especially well in older homes with limited storage.
Coffee tables with storage solve living room clutter problems. Add hinged tops to hollow tables or install drawers in solid pieces. Ottoman storage works well with upholstered tops that provide extra seating.
Multi-Function Furniture Convert dining tables into desk spaces by adding keyboard trays and cord management. This solution works perfectly for homes without dedicated office space. Choose tables with drawers for built-in storage.
Turn old entertainment centers into craft storage systems. The multiple compartments organize supplies efficiently while hiding clutter. Add pegboard backing for tool storage and better organization.
Bed frames can become unique headboards, garden benches, or hall trees depending on their style and construction. Spindle details translate well to coat rack applications.
Style Transformations Modern furniture benefits from vintage hardware and decorative elements. Add carved appliques, decorative molding, or vintage pulls to create period charm. This technique works especially well on plain cabinet doors and drawer fronts.
Traditional pieces gain contemporary appeal through simplified lines and updated colors. Remove unnecessary trim, use clean geometric hardware, and choose neutral paint colors. The contrast between classic construction and modern styling creates interesting focal points.
Mix materials for unexpected combinations. Add metal accents to wood pieces or incorporate fabric panels into solid furniture. These contrasts create visual interest while maintaining functionality.
Color and Pattern Applications
| Style Goal | Color Strategy | Pattern Options | Hardware Choice |
|---|---|---|---|
| Modern Farmhouse | White, cream, gray | Subtle wood grain | Black iron, brass |
| Industrial | Dark gray, black | Metal mesh inserts | Raw steel, copper |
| Bohemian | Rich jewel tones | Stenciled designs | Ornate brass |
| Minimalist | Pure white, natural | Clean wood grain | Simple chrome |
Advanced Techniques for Professional Results

Moving beyond basic painting and staining requires understanding advanced techniques that separate amateur work from professional quality. These methods take practice but produce stunning results worth the effort.
Layered Finishes Building color depth through multiple thin coats creates richness impossible with single applications. Start with a base color slightly darker than your target shade. Apply 2-3 thin coats, sanding lightly between each with 320-grit paper.
Add accent colors through glazing. Mix acrylic paint with glazing medium in 1:4 ratio. Apply with brush or rag, then manipulate with various tools. Cheesecloth creates subtle texture, while sea sponges produce organic patterns. Work in manageable sections since glazes set quickly.
Distressing adds age and character when done correctly. Focus wear on natural high-touch areas like corners, edges, and drawer fronts. Use sandpaper, steel wool, or chain depending on the desired effect. Study authentic antique pieces to understand realistic wear patterns.
Decorative Details Stenciling adds professional-looking patterns without artistic skills. Secure stencils with low-tack tape and apply paint with sponge or stencil brush. Build color gradually with light applications rather than single heavy coats. Clean stencils frequently to prevent bleeding.
Wood burning creates permanent decorative elements. Practice on scrap wood before working on finished pieces. Use different tip shapes for varied effects. Light burning combined with staining creates subtle contrast.
Metal leafing transforms ordinary pieces into luxury statements. Clean surfaces thoroughly and apply sizing according to manufacturer directions. Lay leaf sheets carefully and burnish with soft brushes. Seal with appropriate topcoats to prevent tarnishing.
Hardware Upgrades Replacing hardware dramatically changes furniture character without major work. Measure existing holes carefully and choose new hardware that fits or can be adapted. Drill pilot holes to prevent splitting.
Create custom hardware using basic materials. Wrap plain knobs with rope or leather for rustic looks. Spray paint hardware in metallic finishes for updated appearances. Add decorative washers behind pulls for layered effects.
Consider mixed hardware for eclectic styles. Combine different finishes or shapes within the same piece for interesting contrast. This technique works well on pieces with multiple drawers or doors.
Surface Treatments
Crackling Effects Apply base coat in desired bottom color. When dry, brush crackling medium over entire surface. Apply top coat color while crackling medium remains tacky. Cracks develop as paint dries. Seal with appropriate topcoat for durability.
Antiquing Techniques Dark wax applied over light paint creates authentic aging effects. Work in small sections, applying wax with cloth and removing excess immediately. Focus darker wax in recessed areas and corners where natural dirt would accumulate.
Textural Elements Joint compound creates raised textures when combed, stippled, or dragged with various tools. Apply over primer and paint when dry. This technique adds visual interest to plain surfaces while hiding imperfections.
Troubleshooting Common Problems
Even experienced furniture restorers encounter problems. Understanding solutions prevents project disasters and saves time, money, and frustration.
Paint and Finish Issues Brush marks in painted finishes result from using wrong brush type or poor technique. Natural bristle brushes work best with oil-based paints, while synthetic brushes suit water-based products. Thin coats dry smoother than thick applications.
To fix existing brush marks, sand lightly with 320-grit paper and reapply thin coat. Add paint conditioner to slow drying time and improve flow. Work quickly in manageable sections to maintain wet edges.
Blotchy stain coverage happens when wood absorbs unevenly. Pine, maple, and birch commonly show this problem. Pre-treat with wood conditioner or thin first stain coat 50% with appropriate thinner. Apply conditioner evenly and stain while still damp.
If blotching already occurred, sand back to bare wood and start over with conditioner. Alternatively, apply gel stain which penetrates less and covers more evenly than liquid stains.
Structural Problems Loose joints plague older furniture but fix easily with proper techniques. Clean old glue completely using warm water and scrapers. Modern wood glues bond only to clean wood, not old adhesive residue.
Apply thin, even glue coats to both surfaces. Assemble quickly since most wood glues set within minutes. Clamp firmly but avoid over-tightening which squeezes out necessary glue. Clean squeeze-out immediately with damp cloth.
Stripped screw holes accept wooden toothpicks or golf tees with glue. Insert tightly and trim flush when dry. Drill new pilot holes slightly offset from original locations. This repair often holds better than original construction.
Hardware Difficulties Frozen screws respond to penetrating oil applied 15-30 minutes before removal attempts. Heat from hair dryer expands metal and breaks corrosion bonds. Use proper screwdriver sizes to avoid stripping heads.
If screw heads strip, try rubber band between screwdriver and screw for better grip. Screw extractors remove severely damaged screws but require drill and steady hands. Sometimes cutting new slots with dremel tools allows standard screwdriver removal.
Missing hardware requires careful measurement of hole spacing and diameter. Bring samples to hardware stores for matching. Online retailers offer extensive selections including reproduction antique styles.
Safety and Workspace Issues Dust control protects both health and finish quality. Tack cloths remove fine particles between coats. Plastic sheeting isolates work areas and simplifies cleanup. Change HVAC filters frequently during projects to prevent dust circulation.
Chemical exposure requires adequate ventilation and protective equipment. Work outdoors when possible, especially with strippers and lacquers. Indoor work needs multiple fans creating cross-ventilation. Never work with chemicals in sealed spaces.
Fire safety becomes critical with flammable finishes and oily rags. Dispose of solvent-soaked materials in sealed metal containers or spread flat to dry completely before disposal. Keep fire extinguishers nearby and maintain clear exit paths.
Cost Analysis: DIY vs Professional vs New Furniture
Understanding project costs helps make smart decisions about which pieces deserve your time and which require professional help or replacement.
DIY Project Costs Basic paint makeovers typically cost $25-75 depending on size and paint quality. This includes primer, paint, brushes, and basic supplies. Add $15-30 for hardware upgrades and $10-20 for sandpaper and prep materials.
Staining projects run $35-85 with costs varying by stain quality and protective topcoats. Polyurethane adds durability but increases cost $15-25. Paste wax costs less initially but requires more frequent reapplication.
Major restorations requiring stripping, repair, and refinishing can cost $75-200 in materials. Chemical strippers add $20-40 per gallon. Wood fillers, replacement parts, and specialty tools increase costs quickly.
Professional Service Comparison Furniture refinishing services charge $300-800 for dining tables depending on size and finish complexity. Chairs typically cost $75-150 each. Simple paint jobs run $150-400 while full restoration reaches $500-1200.
Professional work includes guarantees and insurance protection. They also have spray equipment and climate-controlled finishing areas producing superior results. However, costs often exceed new furniture prices except for antique or sentimental pieces.
Upholstery work adds significantly to restoration costs. Simple seat cushion replacement runs $50-150 per chair. Full upholstery including springs and padding costs $200-500 per piece.
New Furniture Economics Quality solid wood furniture costs $800-3000 for dining tables and $150-600 for chairs. Mass-produced furniture costs less but lacks durability and character of restored pieces.
Antique and vintage furniture often provides better construction than modern equivalents. Pre-1950s pieces frequently used superior wood and joinery methods. Restoration preserves these qualities while updating appearance.
Consider long-term value when comparing options. Well-restored solid wood furniture lasts decades with proper care. Particle board furniture rarely survives major moves or heavy use regardless of initial cost.
Time Investment Calculation
| Project Type | Time Required | Skill Level | Cost Range | Professional Cost |
|---|---|---|---|---|
| Simple painting | 8-12 hours | Beginner | $25-75 | $150-400 |
| Staining | 12-16 hours | Intermediate | $35-85 | $200-500 |
| Full restoration | 20-40 hours | Advanced | $75-200 | $500-1200 |
| Structural repair | 15-25 hours | Advanced | $50-150 | $300-800 |
Frequently Asked Questions
How do I know if old furniture is worth restoring? Check the construction first. Solid wood pieces almost always deserve restoration efforts since replacement costs far exceed project expenses. Look for dovetail joints, mortise and tenon connections, and quality hardware as indicators of superior construction. Avoid pieces with extensive water damage, broken main supports, or pest infestation since repairs often cost more than replacement.
What’s the difference between refinishing and repurposing furniture? Refinishing restores furniture to original or period-appropriate appearance using traditional methods and materials. Repurposing changes function or style dramatically, often combining multiple pieces or adding modern elements. Both approaches work well depending on your goals and the piece’s original condition.
Can I use regular house paint on furniture? Regular latex paint works on furniture with proper preparation and topcoat protection. However, furniture-specific paints provide better durability and finish quality. Chalk paint, milk paint, and cabinet paints formulate specifically for furniture applications. They offer better adhesion, durability, and appearance than wall paints.
How long should I wait between coats when painting furniture? Drying times vary by paint type, temperature, and humidity. Water-based paints typically dry in 2-4 hours while oil-based products need 6-8 hours. Always check manufacturer recommendations and test small areas first. Apply thin coats rather than thick ones since heavy applications take longer to cure and may never harden completely.
Conclusion
Furniture repurposing transforms forgotten pieces into stunning statement furniture while saving money and reducing waste. Success depends on choosing appropriate pieces, using proper techniques, and investing time in thorough preparation.
My five years transforming hundreds of furniture pieces taught me that patience and attention to detail separate amateur attempts from professional results. Every project teaches new skills while creating unique pieces impossible to find in stores.
Start with simple projects like painting end tables or refinishing chairs. Build skills gradually before tackling complex restorations or structural modifications. Remember that mistakes happen to everyone, and most problems have solutions with enough creativity and persistence.
The satisfaction of creating beautiful, functional furniture from discarded pieces makes every hour worthwhile. Your transformed furniture tells stories, saves money, and provides conversation pieces that reflect your personal style. Begin your furniture transformation journey today, and discover the rewarding world of creative repurposing.