Fresh food that lasts longer saves money and reduces waste. After five years of testing different pantry organization methods, I’ve discovered systems that can extend food freshness by 30-50%. My name is Richard Boren, and I’ve been helping families optimize their food storage since 2019. What started as a personal mission to reduce my grocery bills turned into expertise that now helps thousands of people keep their pantries organized and their food fresher.
The right pantry organization system does more than make things look neat. It creates the perfect environment for different foods to stay fresh longer. Temperature, humidity, light exposure, and air circulation all play crucial roles in food preservation. When you get these factors right, you’ll notice vegetables staying crisp for weeks instead of days, and dry goods maintaining their quality for months beyond their usual lifespan.
Understanding Food Storage Science
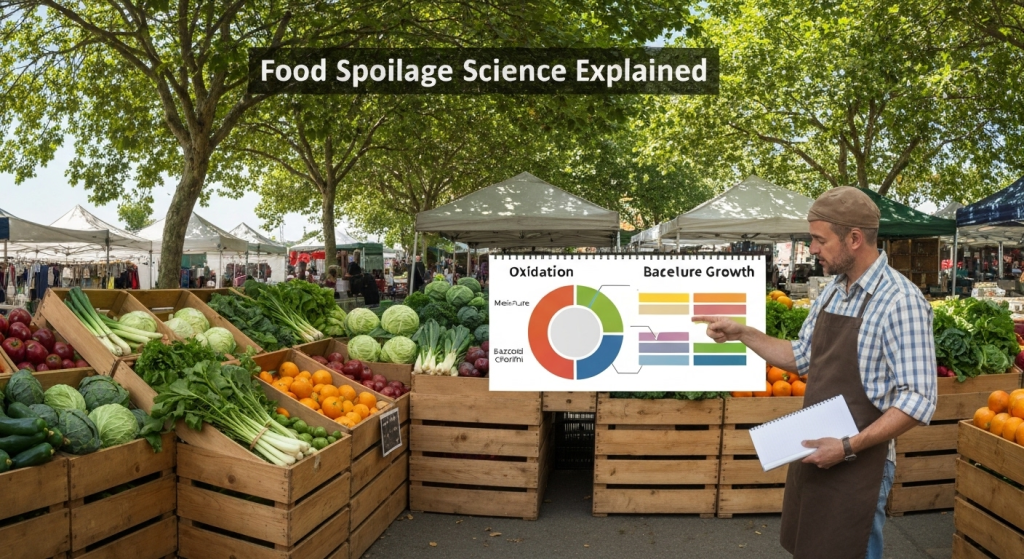
Food spoilage happens through three main processes: oxidation, moisture loss, and bacterial growth. Each type of food has specific needs to slow these processes down. Fruits and vegetables release ethylene gas, which speeds up ripening. Grains and cereals absorb moisture from the air, leading to staleness or mold. Understanding these basics helps you choose the right storage method for each item.
Temperature control makes the biggest difference in food freshness. For every 10-degree drop in temperature, chemical reactions that cause spoilage slow down by half. This is why your pantry’s location matters so much. Areas near heat sources like ovens or sunny windows create hot spots that dramatically reduce food life.
Humidity levels between 50-60% work best for most pantry items. Too much moisture encourages mold growth. Too little causes foods to dry out and lose flavor. Air circulation prevents stagnant pockets where bacteria can multiply. Light exposure breaks down vitamins and causes oils to go rancid faster.
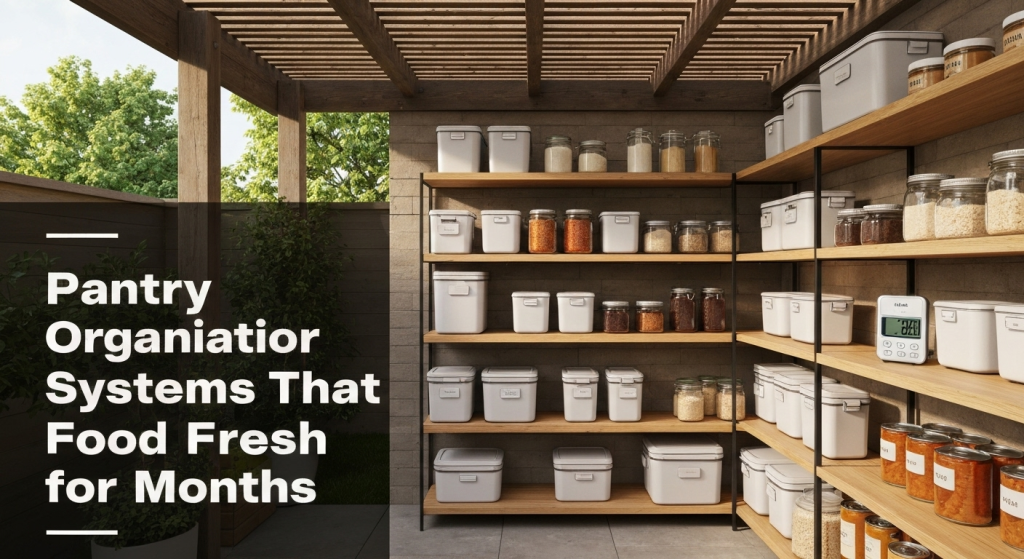
The Container-Based System
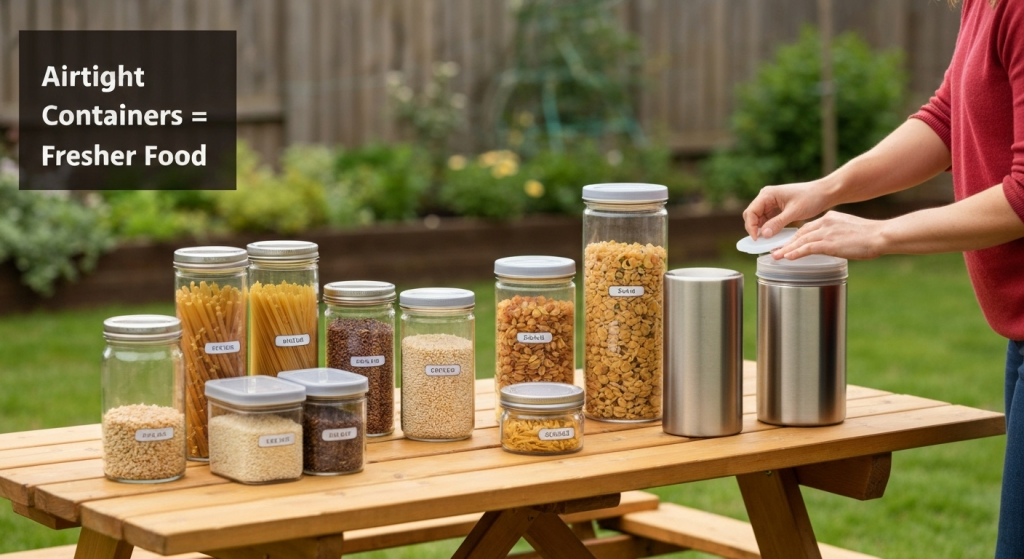
Airtight containers form the foundation of effective pantry organization. I’ve tested dozens of container types over the years, and certain features consistently deliver better results. Look for containers with silicone gaskets, not just snap-on lids. The gasket creates a true airtight seal that keeps oxygen out and freshness in.
Clear containers let you see contents at a glance, but they also allow light penetration. For items stored long-term, choose opaque containers or store clear ones in dark areas. Size your containers appropriately. Large containers work well for bulk items you use regularly. Smaller containers suit specialty ingredients or items you use occasionally.
Container Material Comparison
MaterialProsConsBest ForGlassDoesn't absorb odors, easy to cleanHeavy, can breakOils, spices, leftoversBPA-free plasticLightweight, affordableCan stain and retain odorsDry goods, cerealsStainless steelDurable, light-proofCan't see contentsCoffee, tea, grains
Label everything with contents and storage date. Use a label maker or waterproof markers. Include expiration dates when relevant. This system prevents the guessing game that leads to waste. When you can quickly identify what you have, you’re more likely to use items before they spoil.
Zone-Based Organization Method
Creating specific zones for different food categories optimizes storage conditions and makes meal planning easier. I divide my pantry into five main zones: dry goods, canned items, oils and condiments, snacks, and baking supplies. Each zone gets positioned based on how environmental factors affect those foods.
The dry goods zone goes in the coolest, driest area. This includes cereals, grains, pasta, and flour. Keep these items in airtight containers on middle shelves where temperature stays most stable. Avoid the top shelf, which tends to be warmer, and the bottom shelf, which can be more humid.
Canned goods handle temperature variations better but should stay away from heat sources. Organize cans with labels facing forward and older items in front. This “first in, first out” rotation ensures you use items before they expire.
The oil and condiment zone needs stable temperatures and protection from light. Heat causes oils to go rancid faster, while light breaks down many vitamins in condiments. A lower shelf or inside a cabinet door works well for this zone.
Optimal Pantry Zones Layout
- Top Shelf: Lightweight, rarely used items
- Eye Level: Daily essentials and grab-and-go snacks
- Middle Shelves: Dry goods in containers
- Lower Shelves: Heavy items, oils, bulk storage
- Floor Level: Pet food, large appliances
The FIFO (First In, First Out) System
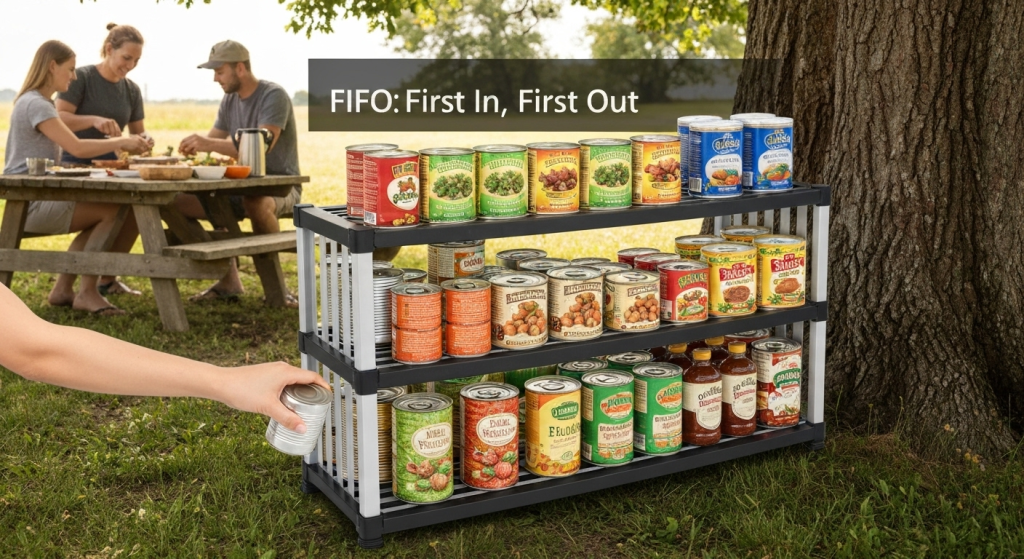
Restaurant kitchens use FIFO rotation to minimize waste and ensure food safety. This system works equally well in home pantries. Every time you add new items, move older products to the front. It sounds simple, but it requires consistent effort to maintain.
Set up your shelves to make FIFO easy. Leave space behind items so you can slide new products to the back. Use shelf dividers or bins to create channels that naturally guide older items forward. For canned goods, consider angled shelf inserts that automatically roll cans toward the front.
Date everything when it enters your pantry. Use a permanent marker to write purchase dates on packages. For bulk items transferred to containers, note both the purchase date and any expiration dates from original packaging. This information becomes crucial when deciding what to use first.
Check expiration dates monthly and move soon-to-expire items to a designated “use first” area. I keep a small basket near eye level for items that need attention within the next week. This visual reminder helps prevent waste and ensures nothing gets forgotten in the back of a shelf.
Humidity and Temperature Control Systems
Moisture control separates good pantries from great ones. Even in climate-controlled homes, pantries can develop humidity problems. Factors like proximity to kitchens, poor ventilation, and seasonal changes create moisture issues that damage food quality.
Silica gel packets, the small packets you find in shoe boxes and vitamin bottles, work excellent for pantry moisture control. Save these packets and place them in containers with dry goods. They absorb excess moisture and can be recharged by heating in a low oven for 30 minutes. Food-grade desiccant packets are also available for purchase.
Small fans improve air circulation in enclosed pantries. A battery-operated fan running for a few hours daily prevents stagnant air pockets where mold can develop. Position fans to move air from top to bottom, as warm air naturally rises and can create hot spots.
Temperature monitoring helps you identify problem areas. Digital thermometers with memory functions track temperature fluctuations over time. Ideal pantry temperatures stay between 50-70°F with minimal daily variation. If your pantry regularly exceeds 75°F, consider ventilation improvements or relocating heat-sensitive items.
Temperature Impact on Food Freshness
- Below 50°F: Too cold for most pantry items, may affect texture
- 50-60°F: Optimal for most dry goods and canned items
- 60-70°F: Good for most foods, monitor humidity closely
- 70-80°F: Acceptable short-term, increases spoilage rates
- Above 80°F: Significantly reduces shelf life of most items
Pest Prevention Through Organization
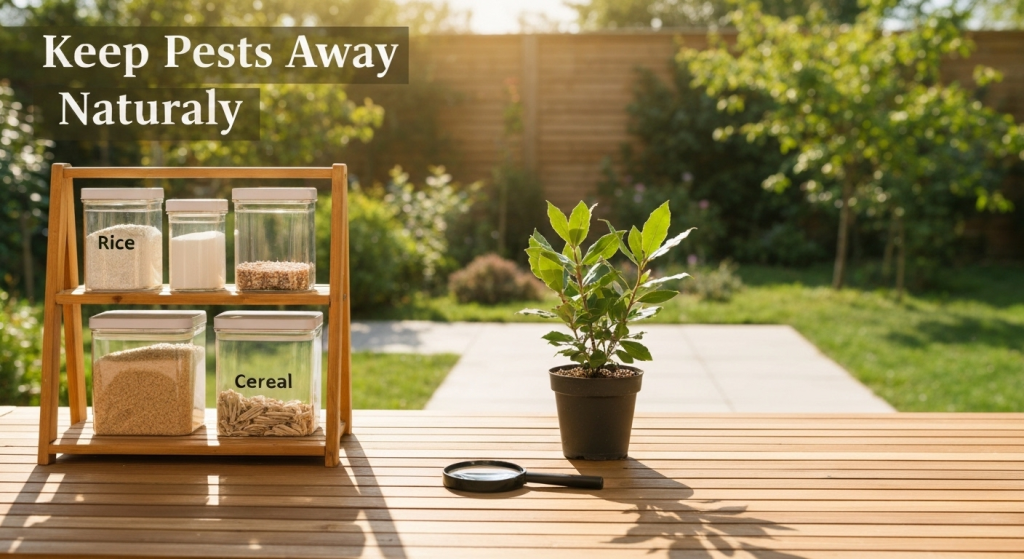
Organized pantries naturally resist pest problems. Pests seek three things: food, water, and shelter. Good organization eliminates these attractants while making it easier to spot problems early.
Airtight containers block access to food sources. Even small gaps in packaging allow insects to enter and contaminate entire packages. I learned this lesson when pantry moths destroyed several boxes of cereal before I discovered the source. Transferring everything to sealed containers solved the problem immediately.
Regular cleaning prevents crumb buildup that attracts pests. Vacuum pantry floors and wipe shelves monthly. Pay attention to corners and cracks where crumbs accumulate. Use a flashlight to check behind containers and appliances where pests might hide.
Bay leaves naturally repel many pantry pests. Place whole bay leaves in containers with grains, cereals, and other susceptible items. Replace them every six months as their scent fades. This natural method works without introducing chemicals near your food.
Monitor for early signs of pest activity. Check for small holes in packages, web-like materials in corners, or tiny insects crawling on surfaces. Early detection makes treatment much easier and prevents widespread contamination.
Smart Storage Solutions for Different Food Types
Different foods require different storage approaches for maximum freshness. What works for grains won’t necessarily work for spices or oils. Understanding these differences helps you create targeted storage solutions.
Grains and Cereals: Store in airtight containers with tight-fitting lids. Add bay leaves to deter insects. Keep in cool, dry areas away from light. Glass jars work well for smaller quantities, while large plastic containers handle bulk purchases.
Spices and Herbs: Light and heat destroy flavor compounds quickly. Store in small, dark containers away from the stove. Whole spices last longer than ground versions. Label with purchase dates and replace annually for best flavor.
Oils and Vinegars: Heat and light cause rancidity. Store in cool, dark locations in original dark bottles when possible. Check for off odors regularly, as rancid oils develop unpleasant tastes and lose nutritional value.
Baking Supplies: Flour, sugar, and baking powder absorb odors and moisture easily. Transfer to airtight containers immediately after opening. Keep baking soda in original boxes with tight-fitting lids, as it naturally absorbs odors.
Canned Goods: Store in cool, dry areas with good air circulation. Check cans regularly for dents, rust, or swelling, which indicate potential safety issues. Rotate stock using FIFO principles to ensure freshness.
Technology Integration for Modern Pantries
Modern technology offers tools that make pantry organization more effective and convenient. Smart sensors monitor temperature and humidity levels, sending alerts to your phone when conditions go outside optimal ranges. These systems cost less than replacing spoiled food and provide peace of mind.
Inventory apps help track what you have and when items expire. Scan barcodes when adding items and set expiration reminders. Some apps suggest recipes based on ingredients you need to use soon. This technology turns your smartphone into a powerful pantry management tool.
Smart containers with built-in scales track how much you have left of different items. When coffee or cereal runs low, the system adds it to your shopping list automatically. While more expensive than traditional containers, they prevent the frustration of running out of essentials unexpectedly.
QR codes on homemade labels link to additional information stored digitally. Include purchase dates, storage tips, or recipe suggestions. This system works especially well for bulk items or homemade preserves where packaging information gets lost.
Maintenance and Long-Term Success
Successful pantry organization requires ongoing maintenance. Schedule monthly reviews to check expiration dates, assess storage conditions, and make necessary adjustments. What works in winter might need modification during humid summer months.
Deep clean your pantry quarterly. Remove everything, vacuum thoroughly, and wipe all surfaces with mild cleaner. This process helps you rediscover forgotten items and maintain the organization system. Use this time to evaluate what’s working and what needs improvement.
Track which foods spoil most often in your pantry. This information reveals problems with your system that need attention. Maybe certain items need different storage conditions, or you’re buying more than you can reasonably use. Adjust your approach based on these observations.
Keep your system simple enough to maintain consistently. Complex systems that require significant daily effort often fail over time. The best pantry organization system is one you’ll actually use regularly without feeling overwhelmed.
Monthly Pantry Maintenance Checklist
- Check all expiration dates and move soon-to-expire items forward
- Wipe down shelves and containers
- Vacuum floors and corners
- Check temperature and humidity levels
- Assess container seal integrity
- Update inventory lists or apps
Frequently Asked Questions
How often should I reorganize my entire pantry? Complete reorganization should happen every 3-4 months, but daily maintenance keeps things manageable. Seasonal changes often require adjustments to accommodate different storage needs and food preferences.
What’s the best container material for long-term storage? Glass containers offer the best protection against odors and chemicals but are heavy and breakable. BPA-free plastic works well for most items and offers better practicality. Choose based on what you’re storing and how often you’ll move the containers.
How can I tell if my pantry has humidity problems? Look for condensation on walls or containers, musty odors, or mold growth in corners. Crackers and cereals that become stale quickly also indicate excess humidity. A simple humidity gauge helps monitor levels accurately.
Should I store all dry goods in containers or keep some in original packaging? Transfer opened items to airtight containers immediately. Unopened packages can stay in original packaging until use, but containers offer better protection and make organization easier. The investment in containers pays for itself through reduced food waste.
Conclusion
Effective pantry organization transforms your relationship with food storage and meal planning. The systems I’ve outlined here come from real experience helping families reduce waste while keeping food fresher longer. Start with one system that appeals most to you, then gradually incorporate others as they become routine.
The key to success lies in consistency rather than perfection. Choose approaches that fit your lifestyle and space constraints. A simple system maintained regularly beats a complex one that gets abandoned after a few weeks.
Remember that pantry organization serves your daily life, not the other way around. Adjust these systems to match your cooking habits, family size, and food preferences. The goal is creating a space that makes meal preparation easier while keeping your food fresh and safe to eat.
Your pantry represents a significant investment in your family’s nutrition and budget. Taking time to organize it properly pays dividends through reduced waste, easier meal planning, and better food quality. Start today with one small change, and build from there. Your future self will thank you for the effort.