

Mason jar upcycling has become one of the most rewarding DIY projects for homeowners looking to add personality to their spaces without breaking the bank. These versatile glass containers offer endless possibilities for creating beautiful, functional decor pieces that reflect your personal style.
As someone who has spent the last five years transforming ordinary mason jars into extraordinary home accents, I’ve discovered techniques that work and ones that don’t. My name is Richard Boren, and my journey with mason jar crafting began when I inherited dozens of vintage jars from my grandmother’s canning collection. What started as a simple way to honor her memory has evolved into a passion that has helped me decorate three different homes and assist countless friends in creating their own unique pieces.
Through trial and error, I’ve learned which paints adhere best to glass, how to prevent cracking during drilling, and which techniques create the most professional-looking results. This hands-on experience has taught me that successful mason jar upcycling requires more than just following Pinterest tutorials – it demands understanding the materials, tools, and techniques that make the difference between amateur crafts and professional-looking home decor.
Why Mason Jars Make Perfect Upcycling Materials
Mason jars offer unique advantages that make them ideal for upcycling projects. Their thick glass construction withstands drilling, painting, and frequent handling. The wide opening allows easy access for cleaning and decorating interior surfaces. The threaded neck accepts various lids and accessories, expanding creative possibilities.
The uniform shape and size of mason jars create consistency across multiple projects. Whether you’re making a set of bathroom organizers or kitchen storage containers, matching jars ensure a cohesive look. Their clear glass showcases contents beautifully while providing a neutral base for any color scheme.
Cost-effectiveness drives many people to choose mason jar upcycling. New mason jars cost less than commercial decorative containers, and vintage jars from thrift stores or garage sales offer even better value. This affordability allows experimentation without significant financial risk.
Essential Tools and Materials for Mason Jar Crafting
Success in mason jar upcycling depends heavily on having the right tools and materials. I’ve learned this lesson through years of experience, starting with basic supplies and gradually building a comprehensive toolkit that produces professional results.
Basic Tools You’ll Need:
- Glass drill bits (multiple sizes)
- Fine-grit sandpaper (220-400 grit)
- Painter’s tape for clean lines
- Small foam brushes for smooth paint application
- Wire brushes for distressing effects
Materials That Deliver Results:
- Glass primer for paint adhesion
- Acrylic craft paint in various finishes
- Clear protective sealers
- Decorative elements (twine, ribbons, beads)
- LED string lights for illumination projects
The quality of your materials directly affects the final result. I’ve found that investing in good glass primer prevents paint from chipping or peeling over time. Similarly, using the correct drill bits prevents cracking and creates clean holes for hanging or electrical projects.
Tool CategoryBudget OptionProfessional ChoicePrice RangeDrill BitsBasic carbide tipDiamond-tipped set$5-25PaintBasic acrylicGlass-specific paint$3-12BrushesFoam applicatorsNatural bristle set$2-15PrimerGeneric primerGlass etching primer$4-18
Lighting Projects That Create Ambiance
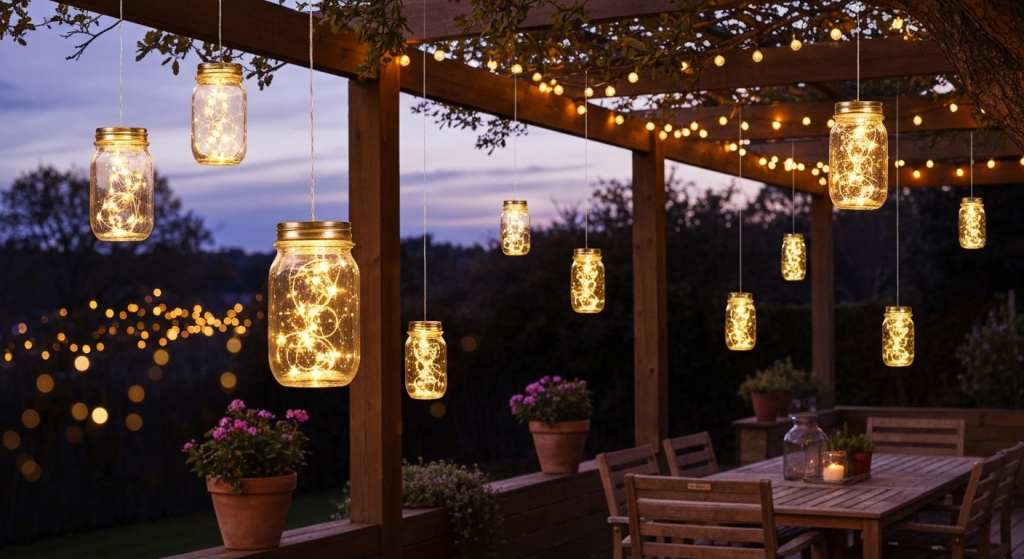
Mason jar lighting projects have become my specialty over the years. These projects range from simple battery-operated string lights to more complex wired fixtures that require electrical knowledge.
String Light Luminaries
Creating string light luminaries requires minimal tools but produces maximum impact. Start by drilling a small hole in the mason jar lid to thread the battery pack cord through. Place LED string lights inside the jar, arranging them to create even light distribution. The warm glow through clear glass creates ambient lighting perfect for bedrooms or outdoor patios.
For outdoor use, ensure your string lights are rated for moisture exposure. I’ve learned that copper wire LED strings work better than silver wire versions because they blend more naturally with the glass and create a warmer color temperature.
Pendant Light Fixtures
Converting mason jars into pendant lights requires more advanced skills but creates stunning results. This project involves drilling larger holes and working with electrical components. Start by removing the jar bottom using a glass cutter and sandpaper. Install appropriate electrical fittings through the jar opening.
Safety considerations are paramount when working with electrical components. Always consult local electrical codes and consider hiring a professional electrician for permanent installations. The investment in proper installation ensures both safety and longevity.
Candle Holders with Style
Mason jar candle holders offer safer alternatives to electrical projects while still providing beautiful ambient lighting. Create hanging versions by wrapping wire around the jar neck or adding metal handles. Fill with sand, pebbles, or decorative stones to secure pillar candles safely.
Floating candles in water-filled jars create elegant centerpieces for special occasions. Add colored water using food coloring or include floating decorative elements like flower petals or glass beads for enhanced visual appeal.
Storage Solutions That Organize and Beautify
Functional storage solutions represent some of the most practical mason jar upcycling projects. These pieces serve dual purposes by organizing spaces while adding decorative elements to any room.
Bathroom Organizers
Mason jars excel as bathroom storage solutions. Create wall-mounted organizers by securing jars to wooden boards or directly to walls using appropriate brackets. These systems work perfectly for storing cotton balls, Q-tips, hair accessories, and small toiletries.
For shared bathrooms, assign different colored jars to family members. This system prevents confusion while maintaining organization. Apply frosted glass spray to jars containing less attractive items while keeping clear jars for decorative storage.
Kitchen Storage Systems
Kitchen applications for mason jars extend far beyond traditional canning. Create spice storage systems by drilling holes in lids to accommodate shaker tops. Label jars clearly using chalkboard paint or adhesive labels for easy identification.
Dry goods storage works exceptionally well in larger mason jars. Store pasta, rice, beans, and baking ingredients in clear jars to monitor quantities while maintaining freshness. The airtight seal prevents pests and moisture damage.
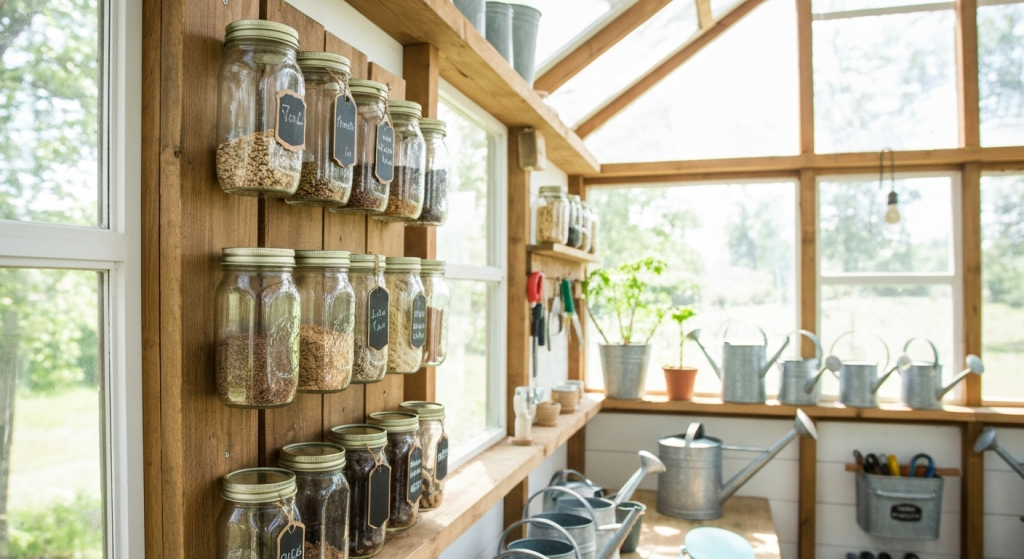
Craft Room Organization
Craft rooms benefit enormously from mason jar organization systems. Create wall-mounted storage for small items like beads, buttons, paper clips, and pushpins. The clear glass allows easy identification of contents while keeping supplies dust-free.
Mount jars under shelves or inside cabinets to maximize space efficiency. This approach keeps frequently used items accessible while maintaining clean work surfaces.
Storage ApplicationBest Jar SizeAdditional MaterialsDifficulty LevelSpice Storage4 oz regularShaker lids, labelsBeginnerBathroom Organizers8 oz wide mouthMounting hardwareIntermediateCraft SuppliesVarious sizesWall bracketsBeginnerKitchen Dry Goods32 oz wide mouthAirtight lidsBeginner
Decorative Accents for Every Season
Seasonal decorating with mason jars allows for frequent room refreshes without significant expense. These projects adapt easily to changing color schemes and holiday themes throughout the year.
Spring and Summer Displays
Fresh flower arrangements in mason jars bring natural beauty indoors. Create hanging planters by adding drainage holes and appropriate potting materials. Herb gardens in mason jars provide fresh ingredients while adding greenery to kitchen windowsills.
Water gardens using aquatic plants create unique decorative elements. Layer colored sand or decorative stones in jar bottoms for visual interest. These displays require minimal maintenance while providing long-lasting beauty.
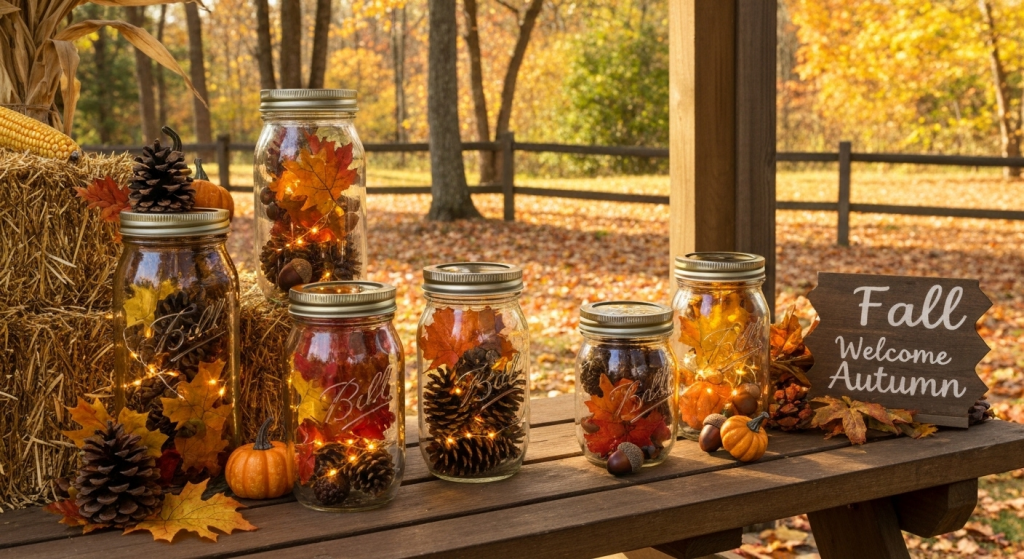
Fall and Winter Themes
Autumn decorating transforms mason jars into warm, cozy accents. Fill jars with seasonal elements like pinecones, acorns, dried leaves, and small pumpkins. Add battery-operated string lights for warm evening ambiance.
Winter themes focus on creating sparkle and warmth during darker months. Apply glass etching cream to create snowflake patterns, or use white paint to create frosted effects. Fill with white lights for winter wonderland displays.
Holiday Celebrations
Each holiday offers opportunities for themed mason jar decorating. Halloween projects might include painted jack-o’-lantern faces or spooky luminaries. Christmas applications range from snow globe alternatives to gift containers.
The key to successful seasonal decorating lies in using removable elements. Adhesive decorations, removable paints, and changeable contents allow the same jars to serve multiple seasonal purposes throughout the year.
Advanced Techniques for Professional Results
After five years of mason jar crafting, I’ve developed techniques that separate amateur projects from professional-looking results. These methods require patience and practice but create pieces worthy of retail display.
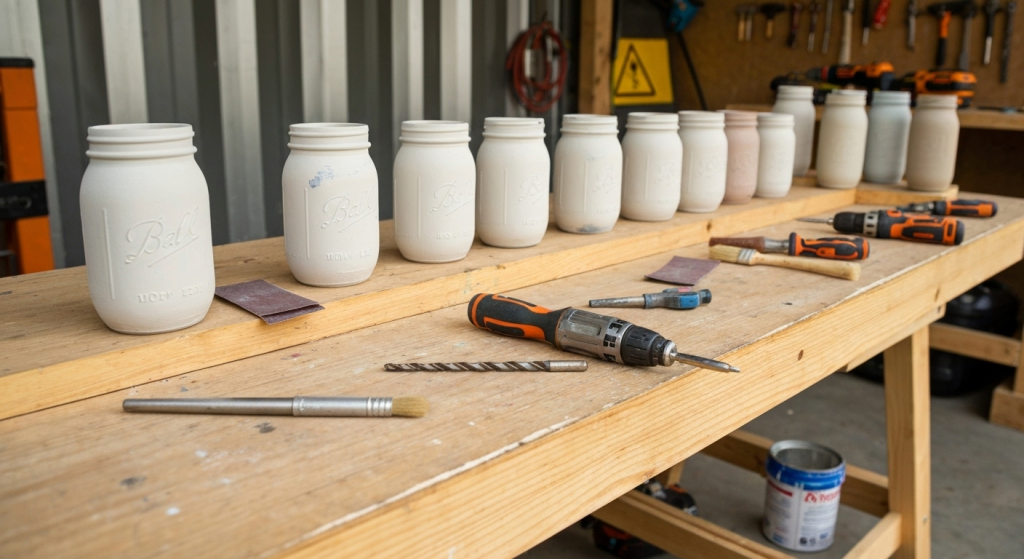
Surface Preparation Methods
Proper surface preparation determines paint adhesion and overall finish quality. Clean jars thoroughly with degreasing agents to remove manufacturing residues. Light sanding with fine-grit sandpaper creates tooth for better paint adhesion.
Primer application represents the most critical step in achieving professional results. Use glass-specific primers that bond chemically with the surface. Apply thin, even coats and allow complete curing between layers.
Painting Techniques That Last
Multiple thin paint coats produce better results than single thick applications. Use high-quality brushes or foam applicators to minimize brush marks. Allow each coat to cure completely before applying subsequent layers.
Distressing techniques add character and vintage appeal to painted jars. Use fine sandpaper to remove paint from raised areas and edges. This technique works particularly well with contrasting base and top coat colors.
Finishing and Sealing
Protective clear coats extend the life of painted finishes and enhance durability. Choose sealers appropriate for intended use – water-based for interior projects, polyurethane for outdoor applications. Apply sealers in thin, even coats to prevent runs and bubbles.
Professional Tips for Success:
- Always work in well-ventilated areas when using paints and sealers
- Test paint compatibility on hidden jar areas before full application
- Keep detailed notes about successful color combinations and techniques
- Photograph completed projects for future reference and improvement
- Practice new techniques on practice jars before working on final pieces
Troubleshooting Common Problems
Every mason jar crafter encounters challenges during their projects. Understanding common problems and their solutions prevents frustration and material waste.
Paint Adhesion Issues
Poor paint adhesion results from inadequate surface preparation or incompatible materials. Always clean jars thoroughly and use appropriate primers. If paint begins peeling, remove all loose material, sand lightly, and restart the preparation process.
Temperature and humidity affect paint curing. Work in controlled environments when possible, and allow extra curing time in challenging conditions.
Drilling Problems
Cracked glass during drilling usually results from excessive pressure or dull drill bits. Use sharp, appropriate drill bits and apply steady, light pressure. Support the jar adequately to prevent stress concentrations.
Starting holes on curved surfaces requires special techniques. Create a small pilot dimple using a center punch or sharp nail set before drilling.
Electrical Safety Concerns
Electrical projects require careful attention to safety standards. Use only appropriate fixtures rated for the application. Consult electrical codes for permanent installations and consider professional installation for complex projects.
Maintenance and Care Tips
Proper maintenance extends the life of upcycled mason jar projects and keeps them looking their best over time.
Cleaning Techniques
Different finishes require specific cleaning approaches. Painted surfaces need gentle cleaning with mild detergents and soft cloths. Avoid abrasive cleaners that might damage finishes.
Clear glass sections clean easily with standard glass cleaners. For hard water stains, use white vinegar solutions followed by thorough rinsing.
Long-term Preservation
Store seasonal projects in protective containers to prevent damage during off-seasons. Wrap delicate pieces in soft materials and avoid stacking heavy items on top of fragile decorations.
Regular inspection allows early detection of finish problems before they become major issues. Touch up minor paint chips promptly to prevent expansion and further damage.
Frequently Asked Questions
What type of paint works best on mason jars? Acrylic paint with glass primer provides the best combination of adhesion, durability, and color options. Avoid latex paints, which don’t bond well with glass surfaces.
Can I put mason jar crafts in the dishwasher? Painted or decorated mason jars should not go in dishwashers. The high temperatures and harsh detergents can damage finishes. Hand wash with mild soap and warm water instead.
How do I prevent paint from chipping on frequently handled jars? Use high-quality primer and apply multiple thin paint coats. Finish with appropriate sealer and avoid excessive handling during the curing period. Allow at least 72 hours for complete curing.
Are there any safety concerns with electrical mason jar projects? Yes, electrical projects require proper fixtures, appropriate wire ratings, and compliance with local electrical codes. Consider professional installation for permanent fixtures and always use GFCI protection for wet locations.
Conclusion
Mason jar upcycling offers endless opportunities for creative expression while providing practical solutions for home organization and decoration. The techniques and projects covered in this guide represent years of hands-on experience and learning from both successes and failures.
The key to successful mason jar crafting lies in understanding your materials, using appropriate tools, and taking time to execute each step properly. Start with simple projects to build skills and confidence before attempting more complex electrical or advanced painting techniques.
Remember that each project teaches valuable lessons that improve your crafting abilities. Keep detailed records of successful techniques, color combinations, and material sources for future reference. Most importantly, enjoy the creative process and take pride in transforming simple glass containers into beautiful, functional home accents that reflect your personal style and creativity.