

Window treatments can make or break a room’s design. After five years of helping homeowners create beautiful spaces without breaking the bank, I’ve learned that you don’t need expensive custom solutions to achieve stunning results. Simple DIY projects can deliver the perfect blend of style and privacy while saving you hundreds of dollars.
My name is Richard Boren, and I’ve been working as an interior design consultant for over five years. During this time, I’ve helped more than 200 families transform their homes using creative, budget-friendly solutions. What started as a side project helping friends has grown into a full-time passion. I’ve seen firsthand how the right window treatments can completely change a space’s feel and function.
Let me share the DIY window treatment ideas that consistently deliver amazing results for my clients.
Understanding Window Treatment Basics
Window treatments serve three main purposes in your home. They control light, provide privacy, and enhance your room’s style. The best solutions handle all three jobs well.
Light control matters more than most people realize. Too much bright sunlight can fade furniture and make rooms uncomfortable. Too little light makes spaces feel dark and cramped. Good window treatments let you adjust light levels throughout the day.
Privacy protection varies by room and location. Ground-floor windows facing busy streets need more coverage than second-story windows overlooking your backyard. Bathrooms and bedrooms require different privacy levels than living rooms.
Style enhancement ties everything together. Your window treatments should complement your room’s colors, textures, and overall design theme. They’re often one of the largest visual elements in a space, so they significantly impact how the room looks and feels.
| Window Treatment Function | Why It Matters | DIY Solutions |
|---|---|---|
| Light Control | Prevents furniture fading, reduces glare | Adjustable blinds, layered curtains |
| Privacy | Blocks unwanted views | Frosted film, strategic positioning |
| Style | Complements room design | Custom fabrics, unique hardware |
Essential Materials and Tools for DIY Projects
Starting any DIY window treatment project requires the right supplies. I always tell my clients to gather everything before beginning work. This prevents frustrating trips to the hardware store mid-project.
Basic tools include a drill, level, measuring tape, and screwdriver. A stud finder helps locate wall studs for secure mounting. Sharp fabric scissors make clean cuts in curtain materials. An iron removes wrinkles and creates crisp edges.
Hardware essentials depend on your chosen treatment style. Curtain rods come in various materials and finishes. Brackets must support the weight of your finished project. Screws and wall anchors ensure secure installation.
Fabric and materials offer endless possibilities. Cotton and linen work well for casual looks. Heavier fabrics like velvet provide better light blocking. Synthetic materials resist wrinkles and clean easily.
Here’s my go-to supply list for most projects:
- Measuring tape (25-foot minimum)
- Level (2-foot works best)
- Drill with various bits
- Fabric scissors
- Iron and ironing board
- Curtain rod brackets
- Appropriate screws and anchors
No-Sew Curtain Solutions
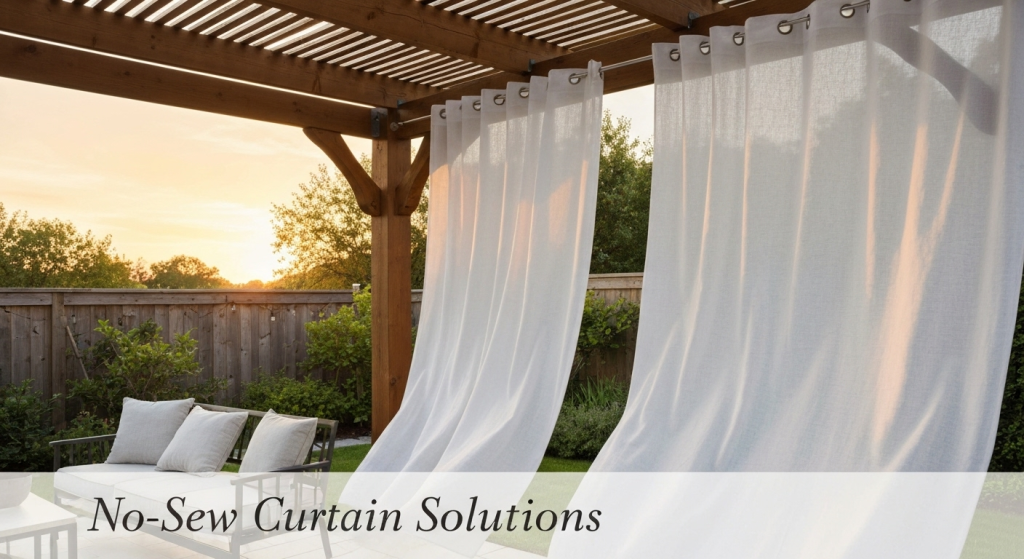
Not everyone enjoys sewing, but that shouldn’t stop you from creating beautiful curtains. No-sew options can look just as professional as sewn versions with the right techniques.
Hem tape creates clean edges without stitching. This double-sided adhesive tape bonds fabric layers when heated with an iron. I’ve used this method countless times with excellent results. The key is using high-quality tape and following temperature instructions exactly.
Clip-on rings eliminate the need for rod pockets or grommets. These rings attach directly to fabric edges and slide smoothly along rods. They work especially well with lightweight to medium-weight fabrics.
Safety pin methods might sound temporary, but they create surprisingly durable results. Large decorative safety pins can become design elements themselves. Position them strategically to create gathered or pleated effects.
One client wanted floor-to-ceiling curtains for her living room but worried about the cost. We bought inexpensive flat sheets in her desired color and used hem tape to create proper lengths. Decorative clip rings completed the look. The total cost was under $40 for three large windows, compared to $300+ for custom curtains.
Pros and Cons of No-Sew Methods
Advantages:
- Quick completion time
- No special skills required
- Easily reversible changes
- Lower cost than professional sewing
Disadvantages:
- May not hold up as long as sewn versions
- Limited to certain fabric types
- Some methods show when viewed closely
Creative Fabric Choices and Where to Find Them

The right fabric can transform an ordinary window treatment into something special. I’ve discovered amazing materials in unexpected places over the years.
Thrift stores often have high-quality vintage fabrics at fraction of retail prices. Look for large tablecloths, bedspreads, or even clothing items that can be repurposed. I once found a beautiful vintage tablecloth that became stunning curtains for a client’s dining room.
Clearance sections at fabric stores offer significant savings. End-of-roll pieces work perfectly for smaller windows. Home decor fabrics go on sale regularly, especially during seasonal transitions.
Drop cloths create trendy, casual window treatments. Canvas drop cloths from hardware stores can be dyed, painted, or used as-is for industrial-style looks. They’re incredibly affordable and surprisingly stylish when hung properly.
Bedsheet conversions maximize your budget. King-size sheets provide enough fabric for multiple panels. Choose interesting patterns or solid colors that complement your decor.
| Fabric Source | Best For | Average Cost | Pros | Cons |
|---|---|---|---|---|
| Thrift Stores | Unique vintage looks | $3-15 per piece | One-of-a-kind finds | Limited selection |
| Fabric Clearance | Traditional curtains | $5-12 per yard | Good quality | Random availability |
| Drop Cloths | Modern/industrial style | $8-20 per cloth | Very affordable | Limited color options |
| Bedsheets | Quick projects | $15-40 per set | Lots of fabric | May lack durability |
Budget-Friendly Hardware Solutions
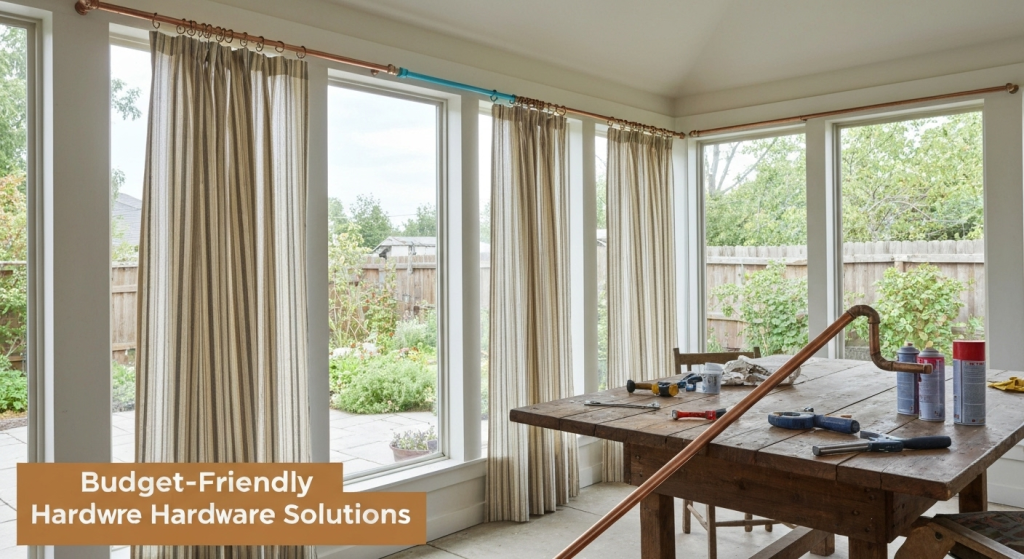
Window treatment hardware doesn’t need to cost a fortune. Smart shopping and creative thinking can deliver professional-looking results for much less money.
PVC pipe makes excellent curtain rods for wide windows. Paint it to match your decor or wrap it with rope for texture. It’s lightweight, inexpensive, and available in various diameters. I’ve used this solution for client projects spanning up to 12 feet without sagging.
Copper pipe creates an industrial or modern look. It develops a beautiful patina over time and supports moderate weight well. Basic plumbing fittings work as end caps and brackets.
Rope and pulleys add nautical charm while providing functionality. This combination works especially well in beach-themed or casual rooms. The rope doubles as both hanging mechanism and decorative element.
Repurposed items offer unique solutions. Old wooden ladders become charming curtain rods for rustic decor. Vintage curtain rods from thrift stores often just need cleaning and new finials.
During one project, a client loved expensive brass hardware but couldn’t afford it. We found similar-looking items at a discount store for 80% less. A quick coat of metallic spray paint made them look identical to the pricey versions.
Privacy-Focused Window Solutions
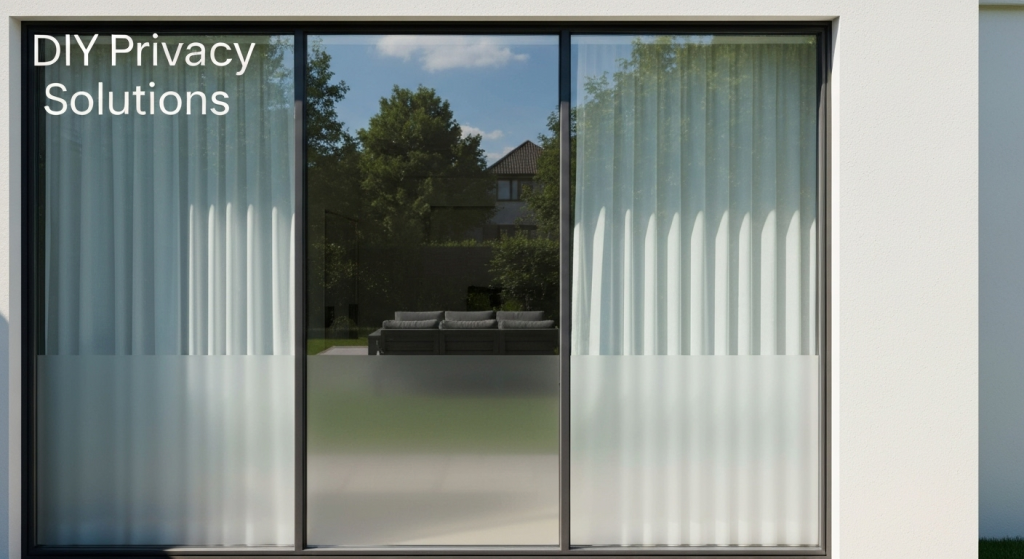
Privacy needs vary throughout your home, but DIY solutions can address any situation effectively. The key is matching your approach to your specific requirements.
Frosted window film provides permanent privacy without blocking natural light. This adhesive film applies directly to glass and comes in various patterns and opacity levels. Installation requires patience but delivers professional results. I recommend this solution for bathroom windows where privacy is essential but natural light is desired.
Top-down, bottom-up treatments offer flexible privacy control. These allow you to cover the lower portion of windows while keeping upper sections open for light. Roman shades work particularly well with this configuration.
Layered approaches combine sheer and opaque materials. Hang lightweight curtains behind heavier panels. This creates options for different times of day and privacy needs.
Strategic positioning maximizes privacy while maintaining style. Hanging curtains closer to the ceiling and wider than the window frame creates the illusion of larger windows while providing better coverage when closed.
DIY Privacy Film Installation Tips:
- Clean glass thoroughly before application
- Work in temperatures between 60-80°F
- Use soapy water to position film before final adhesion
- Smooth out air bubbles with a plastic squeegee
- Trim excess with a sharp blade
Seasonal and Versatile Designs
Creating window treatments that work year-round saves money and storage space. Smart design choices accommodate changing seasons and preferences.
Reversible panels offer two looks in one treatment. Choose fabrics with different colors or patterns on each side. This approach works especially well for rooms that transition between seasons or occasions.
Layering systems provide maximum flexibility. Combine lightweight curtains with heavier panels or blinds. Remove or add layers as needed for different seasons or privacy requirements.
Interchangeable elements let you update looks without starting over. Design basic treatments with removable decorative elements like tiebacks, trim, or valances that can be swapped seasonally.
One client wanted her guest room to feel cozy in winter but airy in summer. We created a layered system with lightweight linen curtains and heavier wool panels. The wool panels store easily when not needed, and the linen provides year-round function.
Color considerations impact seasonal versatility. Neutral bases work with seasonal accent colors. Earth tones transition well between seasons. Bold patterns might limit flexibility but create strong style statements.
Installation Tips and Common Mistakes to Avoid
Proper installation makes the difference between amateur and professional-looking results. I’ve seen too many beautiful DIY projects ruined by poor mounting techniques.
Measure twice, drill once applies especially to window treatments. Mark all mounting points before making any holes. Use a level to ensure straight installation. Double-check measurements against your treatment width before drilling.
Wall anchor selection depends on your wall type and treatment weight. Drywall anchors work for lightweight treatments. Toggle bolts provide better support for heavier installations. When possible, mount into wall studs for maximum security.
Height placement affects how rooms look and feel. Mount curtain rods 4-6 inches above window frames to create the illusion of taller windows. Extend rods 6-8 inches beyond frame width to make windows appear larger.
Common installation mistakes include:
- Not checking for level before drilling
- Using inadequate wall anchors
- Placing rods too close to window frames
- Ignoring wall stud locations for heavy treatments
- Rushing through measurement verification
I once helped a client fix curtains that looked awkward despite beautiful fabric choices. The problem was mounting height – the rods were only two inches above the window frames. Moving them up four inches transformed the entire room’s appearance.
Installation Troubleshooting Table
| Problem | Cause | Solution |
|---|---|---|
| Sagging rod | Inadequate support | Add center bracket or use stronger rod |
| Uneven hanging | Rod not level | Remount using proper level |
| Gaps at edges | Rod too narrow | Extend rod width beyond window frame |
| Difficulty sliding | Rod too small for rings | Use larger diameter rod or different rings |
Maintenance and Care for DIY Treatments
Proper care extends the life of your DIY window treatments and keeps them looking fresh. Different materials require different approaches, but basic principles apply across most projects.
Regular cleaning prevents buildup of dust and dirt. Vacuum curtains monthly using upholstery attachments. Shake out lightweight fabrics outdoors to remove dust. Spot-clean stains immediately to prevent permanent damage.
Seasonal maintenance includes checking hardware for looseness and wear. Tighten screws and brackets as needed. Lubricate moving parts on blinds or other mechanical treatments.
Storage considerations matter for removable seasonal elements. Clean items before storing. Use breathable storage bags to prevent moisture damage. Cedar blocks deter insects in storage areas.
Professional cleaning may be necessary for delicate fabrics or stubborn stains. Many dry cleaners handle window treatment cleaning. Remove hardware before professional cleaning when possible.
During my five years in this field, I’ve learned that clients who follow simple maintenance routines keep their treatments looking new much longer. The small time investment pays off in extended product life and continued satisfaction.
Frequently Asked Questions
How long do DIY window treatments typically last? Well-made DIY treatments can last 5-10 years with proper care. The longevity depends on fabric quality, construction methods, and maintenance. No-sew options may need refreshing sooner than sewn versions.
What’s the average cost savings compared to professional treatments? DIY projects typically cost 60-80% less than custom professional treatments. A window that might cost $200-400 for professional curtains can often be completed for $40-80 with DIY methods.
Can DIY treatments work for unusually shaped windows? Yes, DIY approaches often handle unusual shapes better than standard commercial products. Custom measurements and creative solutions can address most challenging window configurations.
What’s the best starting project for beginners? No-sew curtains using clip rings and ready-made fabric panels offer the easiest entry point. This project requires minimal tools and skills while delivering satisfying results.
Conclusion
DIY window treatments offer an excellent way to enhance your home’s style and privacy without spending a fortune. The key to success lies in careful planning, proper measurement, and choosing techniques that match your skill level.
Start with simple projects to build confidence and skills. No-sew options provide immediate satisfaction for beginners. More complex techniques become manageable with practice and patience.
Remember that professional-looking results come from attention to detail during installation and finishing. Take time to ensure straight, level mounting and proper hardware selection.
Your window treatments should reflect your personal style while serving practical needs. Don’t be afraid to experiment with colors, patterns, and textures that make your space uniquely yours.
The satisfaction of creating something beautiful and functional for your home makes every DIY project worthwhile. Your windows frame your view of the world – make sure they do it in style.